Adding an Event
Events can be found under the Events menu:

On the Events page, any previously added Events will be listed.
Creating an event
To add a new Event, click the green "+ Create Event’ button at the top of the page.


Below is an explanation of the fields on the Event details page.
Title
The title for the event. It should be short and snappy, but explain what the event is.
Date/Time Options
The date/time your event will be taking place. The first checkbox One Day when unchecked will show a second date field - for an end date to the event (If for example it runs over a weekend) The second checkbox Full Day when checked will hide the time drop down options. This provides four different timing options for an event
One Day - Full Day (One date) One Day - Not Full Day ( One date with start and end times) Not One Day - Full Days (Start and end dates, no times) Not One Day - Not Full Day (Start end dates, and start and end times)
Select the date(s)/time(s) from the date/time pickers. The event will be given the date/time details provided here. As soon as it is published the event will be visible on your site as long as the start date is in the future. When the start date is in the past the event will not display on the front end of the site. You will however be able to see it in the admin area, and make any changes to potentially re-use it again in the future.
Image
This image is the thumbnail image that appears under the title in the smaller event previews, and at the top of the event page. Ideally it is an image related to the content, having an image for content dramatically increases interest in that content. Good event images can be quite difficult to choose, if it's a repeating event, photos from previous years can work really well. We recommend use of a landscape image, the system will select the top bit of the image for the square thumbnail preview.
Alt Text
The Alt Text is the description of the image that is read out for users using screen readers. Make this as detailed as you can in one sentence!
Link
The link field will make your event previews link to another page. This can be useful if you want to highlight an event run by a 3rd party. Use with care though, because this link will take a visitor away from your website.
Short Description
This description is the short bit of taster text that appears under the title and image in the smaller event previews. It should reveal some more about the event, but be interesting enough for users of your site to want to learn more about your event.
Content
The content box is the main body of the event. This is the same text editor present on most of the editable content pages in the Schudio CMS. For more detailed instructions on using the text box please click here.
Embed Codes
Here you will find a complete list of all the media which you can embed into the content
Tags
The tags box allows you to categorise and tag your events. For more on tags click here.
Show In Calendar
This checkbox is ticked by default and automatically adds the event to the calendar on your site. Unticking the box will stop the event being shown on your calendar. For more details on using the calendar click here
Calendar Category
If you have set up categories for your calendar you can add the event to that category. This means the event will adopt the category colour and is included in the events for people who have subscribed to that category.
Publish
The publish checkbox is ticked by default and allows the content to be shown on the site. If the publish checkbox is not ticked the content will not be shown.
New Field Options
Following recent development updates, all Schudio clients now have the option to request headteacher information from schools when they book onto an event via the Events Module.
How It Appears on Your Website
You can see in the screenshot below how this new field appears on a live event booking form, allowing schools to easily provide the headteacher’s details during registration.

How to Enable the Feature in Your Events Module
- Head to your Events Module on the left-hand menu in the admin area and click edit on the event you would like to apply this to.
- Locate the “Show Headteacher Name and Emails Fields” toggle option (highlighted in the screenshot below).
- Switch the toggle on to enable the feature.
- Save your changes - once confirmed, the field will automatically appear on your public event booking form.

That’s it! Your event booking form will now collect valuable headteacher information, helping you manage and follow up on event registrations more effectively.
Updating Event Booking Settings
This guide walks you through the new booking field customisation tools that have been added to the Events module. These updates give you far more flexibility when collecting information from attendees.
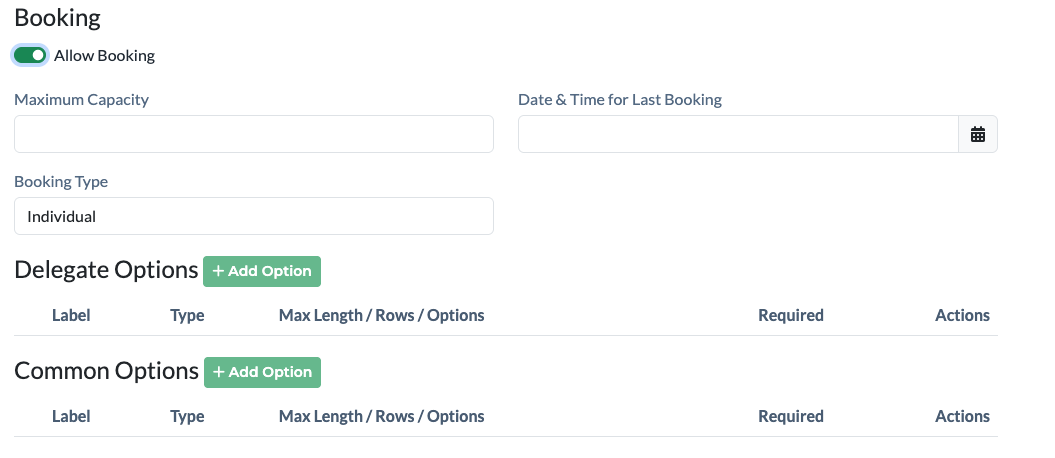
1. Enable Booking
At the top of the Booking section, you will see an Allow Booking toggle.
Turn this on to reveal the full set of event booking options.
Once enabled, you will see additional fields such as:
- Maximum Capacity
- Date and Time for Last Booking
- Booking Type
- Delegate Options
- Common Options
2. Introducing Delegate Options and Common Options
A new enhancement to the system now allows you to create your own custom fields. This means you can collect the exact information you need for each event.
There are two categories of custom fields:
Delegate Options
These fields apply to individual delegates or attendees.
Common Options
These fields apply to the overall booking (for example, organisation details or group-based questions).
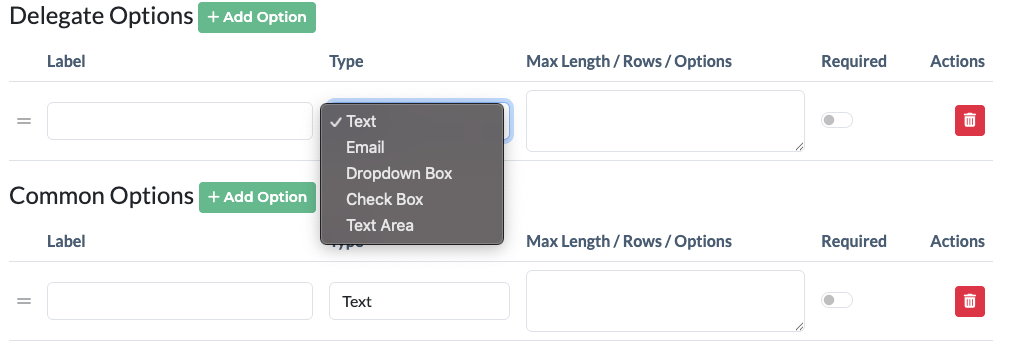
3. Adding a New Field
In either section, select Add Option to create a new custom field.
You will be able to set:
Label
The name of the field as it should appear to your users.
Type
Choose the input style your field should use. Available types include:
- Text
- Dropdown Box
- Check Box
- Text Area
This makes it easy to gather the right type of information depending on your needs.
Max Length / Rows / Options
Depending on the field type, you may be able to define:
- Maximum number of characters
- Number of rows for longer text
- Dropdown options
Required Toggle
Each field includes a toggle that allows you to mark it as Required.
When switched on, users will need to complete this field before submitting their booking.
4. Why This Feature Was Added
These improvements were developed after extensive feedback from our clients. Many users wanted the ability to tailor booking forms to suit different types of events, workshops, training sessions and other activities.
By adding custom fields, you can now shape the booking experience to match your specific data collection needs, making the Events section more flexible and useful across a wide range of scenarios.